Windows 10 Installation Problem 0x1900101 - 0x2000c - SAFE_OS Phase Error During APPLY_IMAGE Operation!

Solution
           Is Your PC showing error when Installing Windows 10? After the Installation it Upgrades for 10,11,12% or a bit more then suddenly restart and shows Windows 10 Installation Problem 0x1900101 - 0x2000c  - SAFE_OS Phase Error During APPLY_IMAGE Operation? & then showing Restoring to Previous Version of Windows?
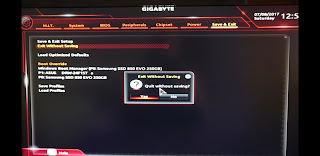
The Only and one Solution works for me is BOOT from USB via/through BIOS setting.
Before Installing Windows 10 I was suffering with BSOD (Blue Screen Of Death), tried a lot SFC,SFC Fix but still  there is .dll issues which showing error. Then I Decided to move to Windows 10. Also Microsoft posted a death date of Windows 7 updates. Microsoft Windows 7 Updates will fully stop from 14th January 2020 as the Microsoft website. So i Decided to move to Windows 10.

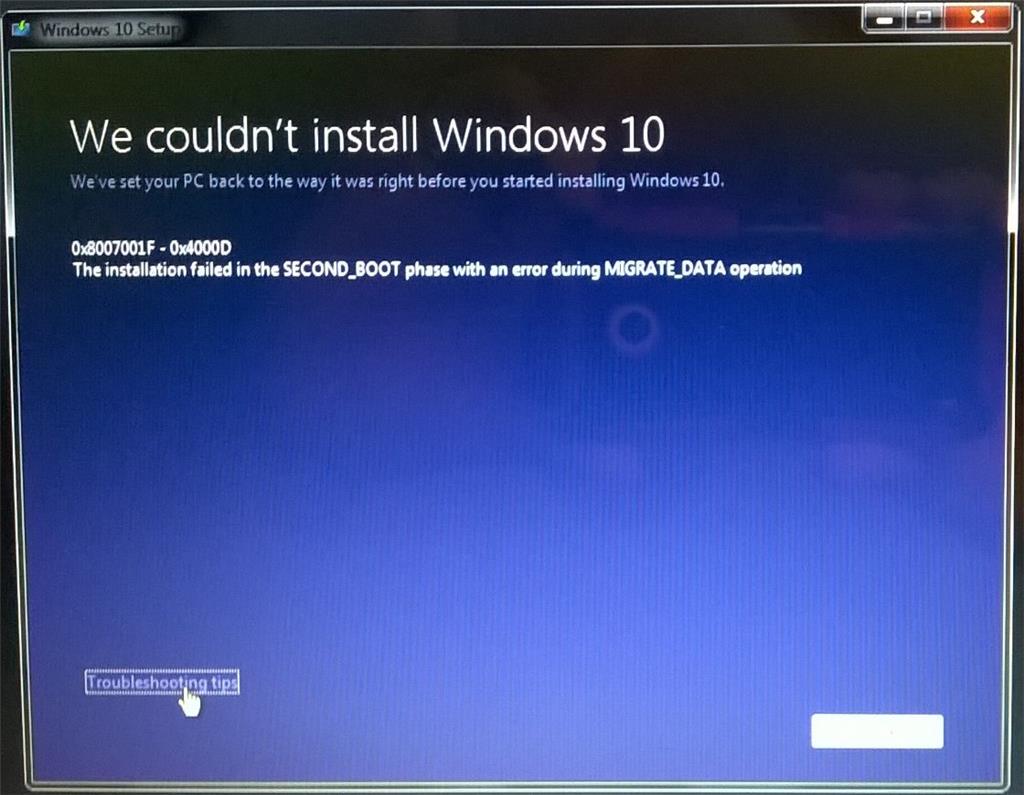
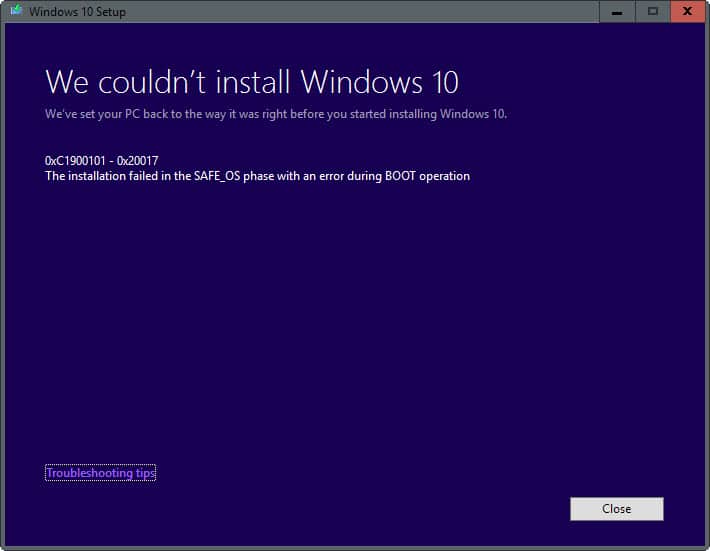
Some ScreenShoot of problem:

Click The Image To Expand

Click the Image to See Full Screen:
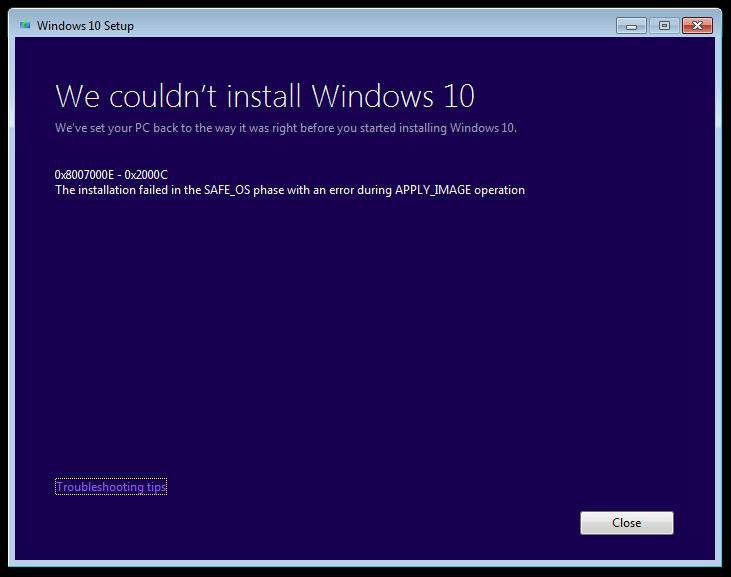
ss1
ss2
ss3
×
×

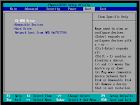
ScreenShot Of BIOS Setting:
Morden BIOS: Set USB as First BooT 1st Priority
BiOs2
Press F10 Save
×
×
×
Below See How To Set BIOS & Fix Issue!!

BIOS Setting to BOOT from USB :
About Boot Priority
To boot from a CD, DVD or USB device, make sure that the device has boot sequence priority over the hard drive.

BIOS Boot

BIOS (Basic Input Output Subsystem) is a programmable chip that controls how information is passed to various devices in the computer system. A typical method to access the BIOS settings screen is to press ESC, F1, F2, F8 or F10 during the boot sequence.
BIOS settings allow you to run a boot sequence from a floppy drive, a hard drive, a CD-ROM drive or an external device like USB drive. You may configure the order that your computer searches these physical devices for the boot sequence.
The first device in the order list has the first boot priority. For example, to boot from a USB drive instead of a hard drive, place the USB drive ahead of the hard drive in priority.
Before you set boot priority for a USB device, plug the device into a USB port.
To specify the boot sequence:
  1. Start the computer and press ESC, F1, F2, F8 or F10during the initial startup screen. Depending on the BIOS manufacturer, a menu may appear.
  2. Choose to enter BIOS setup. The BIOS setup utility page appears.
  3. Use the arrow keys to select the BOOT tab. System devices appear in order of priority.
  4. To give a DVD or USB drive boot sequence first priority over the hard drive, move it to the first position in the list.
  5. To give a USB device boot sequence priority over the hard drive, do the following:
    • Move the hard drive device to the top of the boot sequence list.
    • Expand the hard drive device to display all hard drives.
    • Move the USB device to the top of the list of hard drives.
  6. Save and exit the BIOS setup utility.
  7. The computer will restart with the changed settings.
BIOS Screenshots For Help is Above!!

Set The Bios & Restart Your Computer,it will ask for press any key to boot from USB, just press and proceed to direct installation Screen, Install Enjoy!!

Download Windows 10 Pre Activated Full on : www.datavilla.in
Or Click Below Post To Go To The Post to Download Torrent and File From Google Drive.

Thanks For Viewing !!
Please Share To Solve Others Too!!

No comments

Powered by Blogger.